How To Identify Fake Torrents Uploaded By Anti-piracy Organizations, They can catch u and make u pay dearly
Did you know that MPAA and RIAA are always setting traps for pirates to get caught of downloading copyright materials? I didn't know that until I read one article from TorrentFreak. The anti-piracy organizations can easily trace you when they upload a very popular .torrent file to some popular torrent tracker site. When you download the .torrent file and load it, your bittorrent client will start connecting to the anti-piracy organizations trackers. That's when they record your IP address and can possible get in touch with you for downloading copyrighted materials!
This is a very scary trap because I know a lot of people who knows how to download from bittorrent but don't know anything about peer, leecher, tracker and etc... In short, they don't know how bittorrent works but they know that by waiting for days, the download will complete and they get what they want.Here's how you can know if the Torrent or Tracker is fake.Fenopy has created a Fake Finder page that lists the most popular fake torrents and the latest fake trackers. It also allows you to search for fake torrents by keyword or infohash.I took a look at the whole list of all fake torrents and the filename looks pretty real. There's no way you can know whether the torrent is fake or not unless it's listed on Fenopy Fake Finder list.If you're using uTorrent, here's how to check which tracker are you connecting to.After loading torrent file to your bittorrent client, look at the "General" tab and you'll see "Tracker URL".
If the tracker URL is listed on Fenopy Fake Finder, please, don't even start downloading it!Technorati Tags: utorrent, tracker, MPAA, RIAA, piracy, pirates, Fenopy, Fake Finder, bittorrent
Showing posts with label torrent. Show all posts
Showing posts with label torrent. Show all posts
Wednesday, May 6, 2009


Monday, May 4, 2009
How to Install Windows Vista from USB Flash Drive
STEP-BY-STEP INSTRUCTION
Item needed : USB 2.0 flash drive (min 4GB)
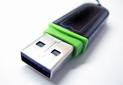
Step 1: Format the Flash Drive to FAT32 file system by
Run CMD.EXE and type the following command. Note: This set of commands assumes that the USB flash drive is addressed as “disk 1″. Double check that by doing a list of the disks (type “list disk”) before cleaning it).
1. Diskpart
2. Select disk 1
3.Clean
4.Create partition primary
5.Select partition 1
6.Active
7.Format fs=fat32
8.Assign
9. Exit
Step 2. Copy Windows Vista’s DVD ROM content to the Flash Drive
Type in command to start copying all the content from the Windows Vista DVD to your newly formatted high speed flash drive.
Item needed : USB 2.0 flash drive (min 4GB)

Step 1: Format the Flash Drive to FAT32 file system by
Run CMD.EXE and type the following command. Note: This set of commands assumes that the USB flash drive is addressed as “disk 1″. Double check that by doing a list of the disks (type “list disk”) before cleaning it).
1. Diskpart
2. Select disk 1
3.Clean
4.Create partition primary
5.Select partition 1
6.Active
7.Format fs=fat32
8.Assign
9. Exit
Step 2. Copy Windows Vista’s DVD ROM content to the Flash Drive
Type in command to start copying all the content from the Windows Vista DVD to your newly formatted high speed flash drive.
- xcopy d:\*.* /s/e/f e:\
STEP 3. Setup your computer BIOS to boot from USB Drive
STEP 4. Install Windows Vista from flash memory drive
After finish the above step. you can try to view how fast the installation of windows vista can be completed. Let us know how you feel if whether installing windows vista on flash memory drive compare the installation window vista on DVD media.
Subscribe to:
Posts (Atom)
